Share this:


About three years ago, I became fed up with a situation that I’m sure all long-haired girls can relate to: going to the hairdresser, requesting just a slight trim (emphasis on the word “trim”), and leaving with the perception of having a bob. Although your hair may still be long in the eyes of most people (*cough* everyone), the hairdresser got a bit too scissor-happy and the length is still a few inches shorter than you desire. To prevent ever having to endure this trauma again, I decided to take matters into my own hands (literally) by starting to cut my own hair at home.
I’m not going to lie, the first time I decided to do this I was extremely intimidated. After all, my hair is one of my most prized assets, and DIY hair fails are what nightmares are made of (remember that episode of Girls when Hannah gives herself a tragic-looking bowl cut?) After watching a few YouTube tutorials and mustering up some confidence, I finally decided to bite the bullet and just go for it. The process took about an hour as I carefully contemplated every snip, however, I was quite pleased with the results.
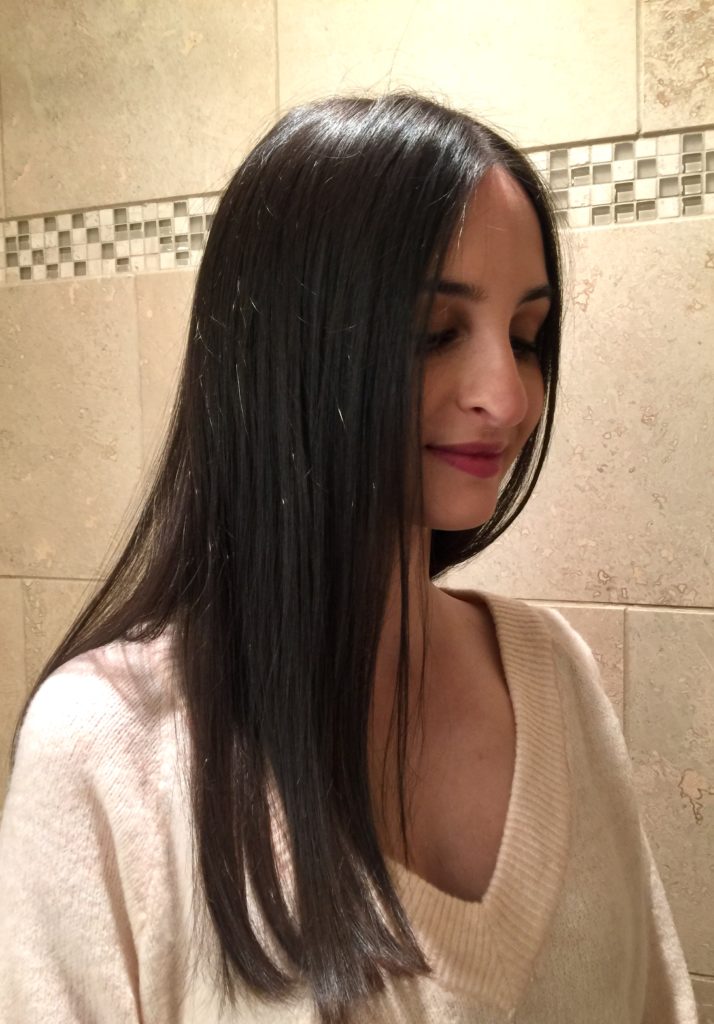
Now several years later, I think I’ve pretty much mastered trimming my own hair. I have devised a specific method that works for me, which I can usually complete in 15 minutes or less (I then repeat the process about once a month). Although I am not a professional by any means, I think I do a pretty good job of achieving the look I want — long in the back with shorter (but still long) layers in the front. If your signature style is the same as mine and you have no desire to ever step foot in a salon again, then follow the steps outlined below.
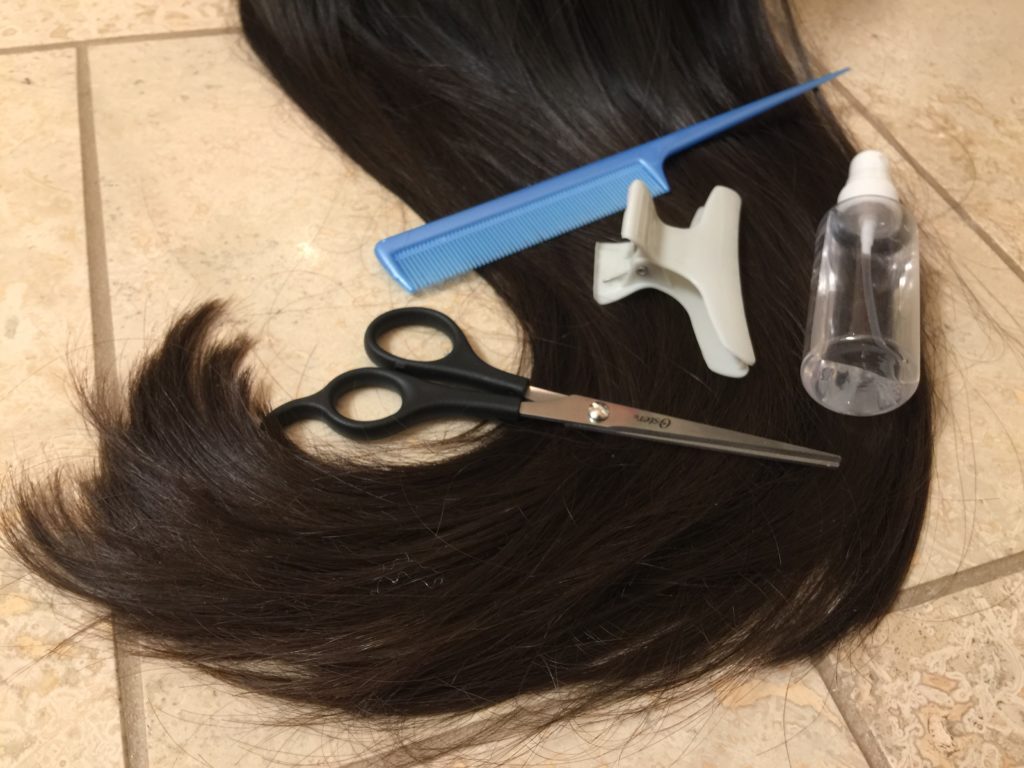
Supplies Needed
- Hair-Cutting Sheers: Those dinky scissors you still have from Grade 7 art class won’t cut it. To achieve a clean, professional-looking cut, sharp hair-cutting sheers are a must. I use the 5 Inch Bronze Series Stylist Shears ($11.79) from Sally Beauty
- Detangling Spray: To make sure your hair is knot-free before going in. I use the L’Oréal Paris Total Repair 5 Detangling Care Spray ($6.76) from Walmart
- Combs: One fine-toothed comb and one larger comb should do the trick
- Large Hair Clips / Elastic Bands: For sectioning off your hair, make it easier by tackling just one section at a time
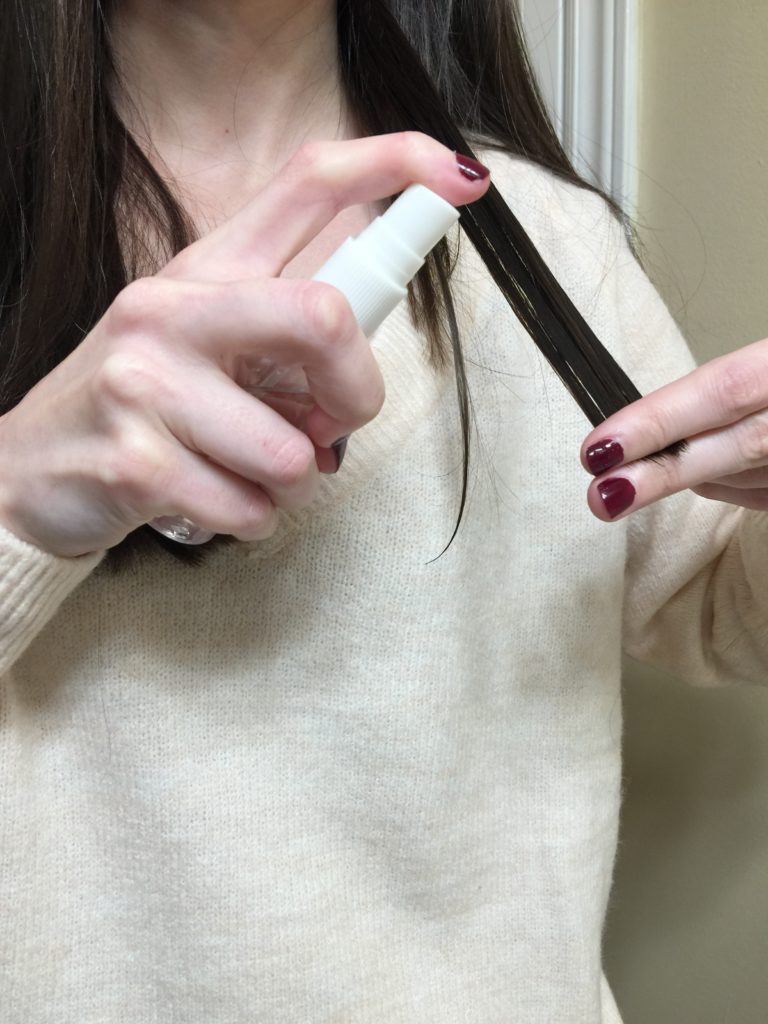
- Spray Bottle: To spritz water on your hair to keep it damp throughout the process
- Paper Towel: As I cut my hair over my bathroom sink, I always line it with a paper towel first for easy cleanup
Steps:
- Wash hair in shower
- Immediately after getting out of the shower, use detangling spray and a large comb to get rid of any knots
3. Use a fine-toothed comb to part your hair in the middle
4. Wait about 10 minutes or until hair is damp (you can also towel-dry to speed things up). I like to cut my hair when it’s damp, as it is easier to manage than dry hair and allows for a more even cut
5. Take all of the hair on the right side of your head, and section it off over your right shoulder so it doesn’t get in the way of the left side (you can use an elastic band or large clip to put it in a pigtail)
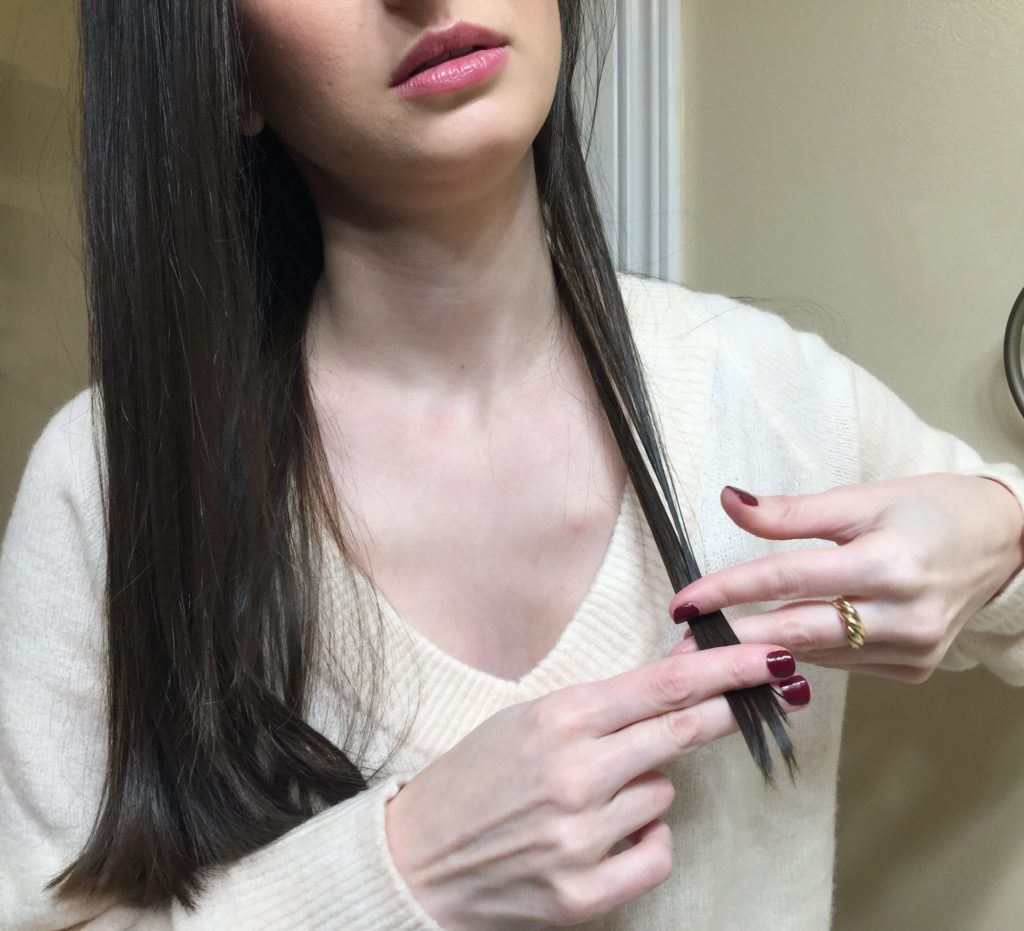
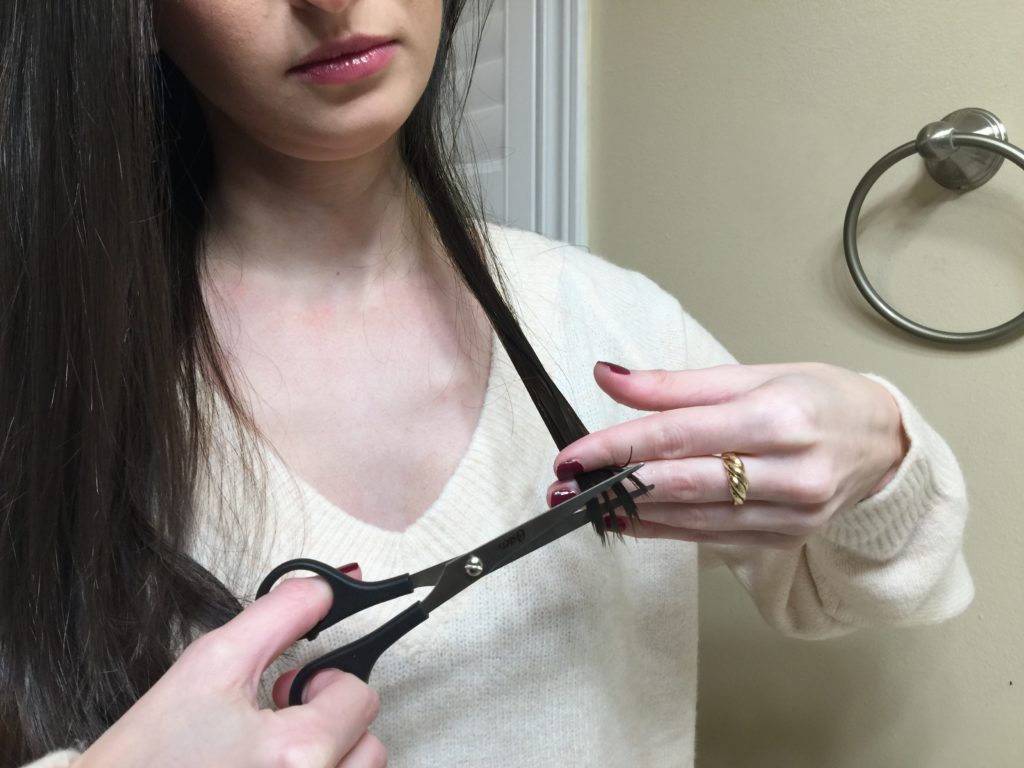
6. With the hair that is still down on the left side, take a small portion of hair starting from the very back of your head (about 2 centimetres wide), and bring it forward over your shoulder. You never want to cut off large chunks of hair in one go…small incremental snips are key!
7. With the rest of the hair on your left side, put it in an elastic band or large clip
8. Holding your hair-cutting sheers in one hand and the 2-centimetre section of hair in the other, cut off about 1 inch straight across while looking down at the hair (not in the mirror). You can cut off more, but it’s important to remember that the length of your hair may shrink a bit when it’s dry, so be modest
9. Take another 2-centimetre wide section of hair out of the elastic/clip on your left side and bring it down over your shoulder. Smooth it out alongside the section of hair you just cut (you can use this hair as a guide) and cut off one inch straight across so both sections are the same length
10. Repeat step #9, by continuing to bring down and cut 2-centimetre wide increments of hair until you reach the front part of your face where you want the layers to start
11. Take out a 2-centimetre wide section of hair and cut it about 1.5 inches straight across (and then shorter for each continuing layer). You can gauge how short you want each layer to be by comparing it to the section of hair that was cut before it

12. Repeat step #11 to cut as many layers as you want (I usually cut about 4-5 layers)
13. Take a 2-centimetre wide section of hair from the very back of your head out from the elastic/clip on the right side of your head
14. Match this hair up with the section of hair you already cut from the same area on the left side of your head, by bringing both sections forward in front of your face. Using the section hair on the left side as a guide, cut 1 inch off the right so both sections are the same length

15. Repeat steps #9-#10
16. Before you cut each layer on the right side, try to match it up to the layer you have already cut in the same area on the left side, by bringing both sections forward in front of your face. Using the section of hair on the left side as a guide, cut the hair on the right straight across so both sections are the same lengt
17. Check in the mirror to make sure everything is even, and cut off any stray pieces you may have missed
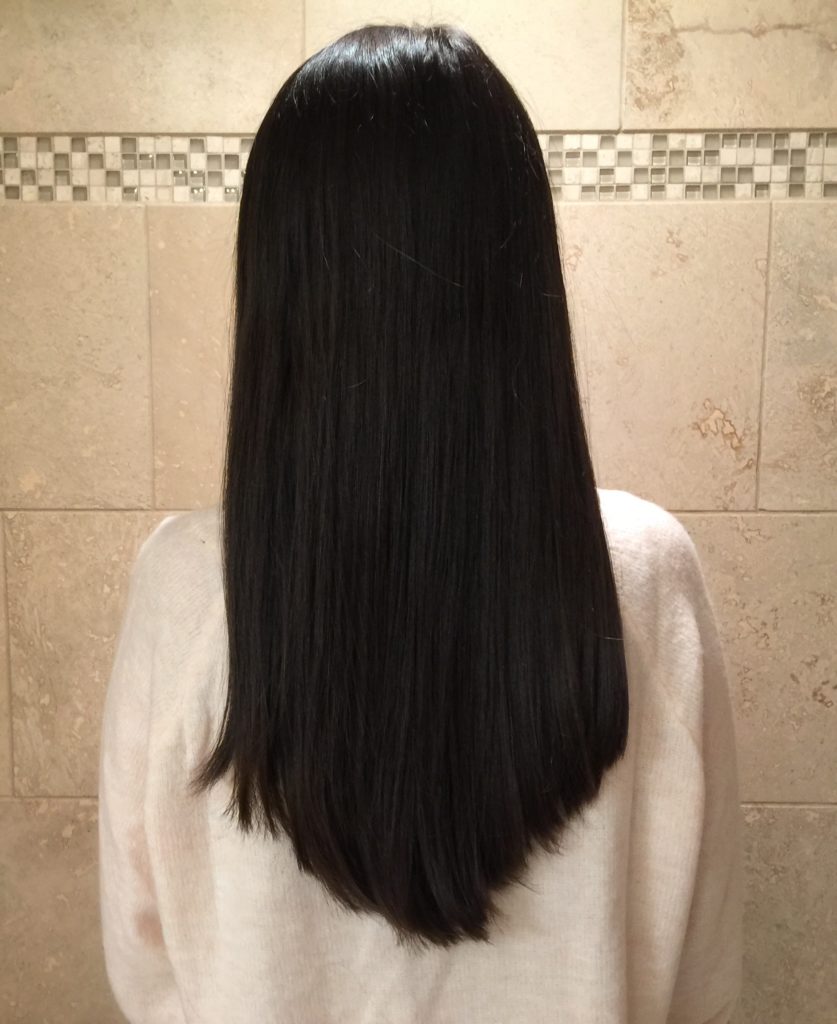
And voila! Not only do you have the exact haircut you want, but you’ve also saved precious time and money by DIY-ing it at home. Now head on over to Sephora and buy yourself something special!
Would you cut your own hair or is it too scary? Let us know in the comments!
Featured images: Faryn Wegler
Posts you might be interested in:
10 DIY Lip Scrub Recipes for Soft Lips
Why I’m Obsessed with Japanese Hair Straightening
I Effed Up My Hair: This is How to Fix a Bad Box Dye
These 14 Craziest Instagram Beauty Trends Will Make Your Day
Brighten Up: Banish Dark Circles, Uneven Skin Tone with These Beauty Buys